General Information:
Release Date: February 17, 2023
Price Point: $54.99 (depending on retailer)
Retailer: General Release (Amazon, BigBadToyStore, Entertainment Earth, Target, Walmart etc.)
Accessories: Blaster Arm, Claw Arm

Official images and product description in italics below are from Amazon.com:
- TRANSFORMERS STUDIO SERIES LEADER CLASS: These 8.5-inch collectible action figures inspired by iconic movie scenes and designed with specs and details to reflect the Transformers movie universe
- 8.5-INCH SCALE SCOURGE: Transformers Studio Series 101 Scourge action figure for boys and girls is highly articulated for posability and features movie-inspired deco and details
- 2 ICONIC MODES: This Transformers toy for 8 year old boys and girls features classic conversion between robot and truck modes in 31 steps
- AWESOME ACCESSORIES: Transformers figure comes with a blade accessory and detachable blaster and claw hand attachments that attach to the Scourge figure in both modes
- REMOVABLE BACKDROP: Removable backdrop displays Scourge figure in the Attack at the Museum scene. Fans can use the backdrop and pose their figures in the scene with their own style
Bring the epic action of the Transformers movies from the big screen into your collection with the Transformers Studio Series Leader Class Scourge action figure! Scourge and the Terrorcons face off against the Autobots in a battle for the Transwarp Key. Transformers Studio Series toys are collectible action figures for 8 year old boys and girls that feature movie-inspired details and accessories. Convert the action figure from robot to truck mode in 31 steps and pose the Scourge toy in the included Attack at the Museum removable backdrop scene. Transformers action figures for boys and girls make great gifts!
Packaging:
Scourge is packaged in a standard rectangular Studio Series Leader Class box. The front of the box is closed, featuring artwork showing Scourge looking like he is coming at the viewer with an explosion behind him (which calls back to a scene in the film). Towards the bottom is the Rise of the Beasts logo above the Studio Series logo and his name. The left side of the box features different artwork with Scourge deploying his arm blade weapon. The back of the box shows off the figure in both modes calling out a 31 step transformation. It also shows off his blaster weapon off to the left. The backdrop included with the figure shows a series of columns from the museum scene in the movie.
Accessories:
In the Rise of the Beasts film, Scourge has the ability to transform his left arm into a blaster weapon. This figure represents this feature with a blaster accessory. In the film, Scourge's blaster arm can actually take two forms. One still has his claws showing, the other is more of a fully formed weapon barrel. This represents the latter. The weapon has a thick barrel and there are four raised sections that you can imagine are his "claws" forming parts of the weapon barrel. This piece is made out of grey plastic on the outside with dark grey on the inside.
The blaster arm attaches to Scourge's left arm. Remove the claw/forearm (which is why I count it as another accessory) and just replace it with the blaster arm. The opening in the front is sized to fit a Blast Effect.
Robot Mode:
Deigning Studio Series figures figures is always a tricky endeavor. The CG designs in the live action films have the luxury of movie magic to change from one form to another, but an action figure does not. This is made even more challenging if the CG models Hasbro references are not final - and that was the case with the models used for the Rise of the Beasts toys. Movie Special Effects can be changed weeks up to the release of a film, but the toy designs have to be finalized half a year or more before you get the figure in your hands and that is going to cause some differences between what you see on screen and the final figure.

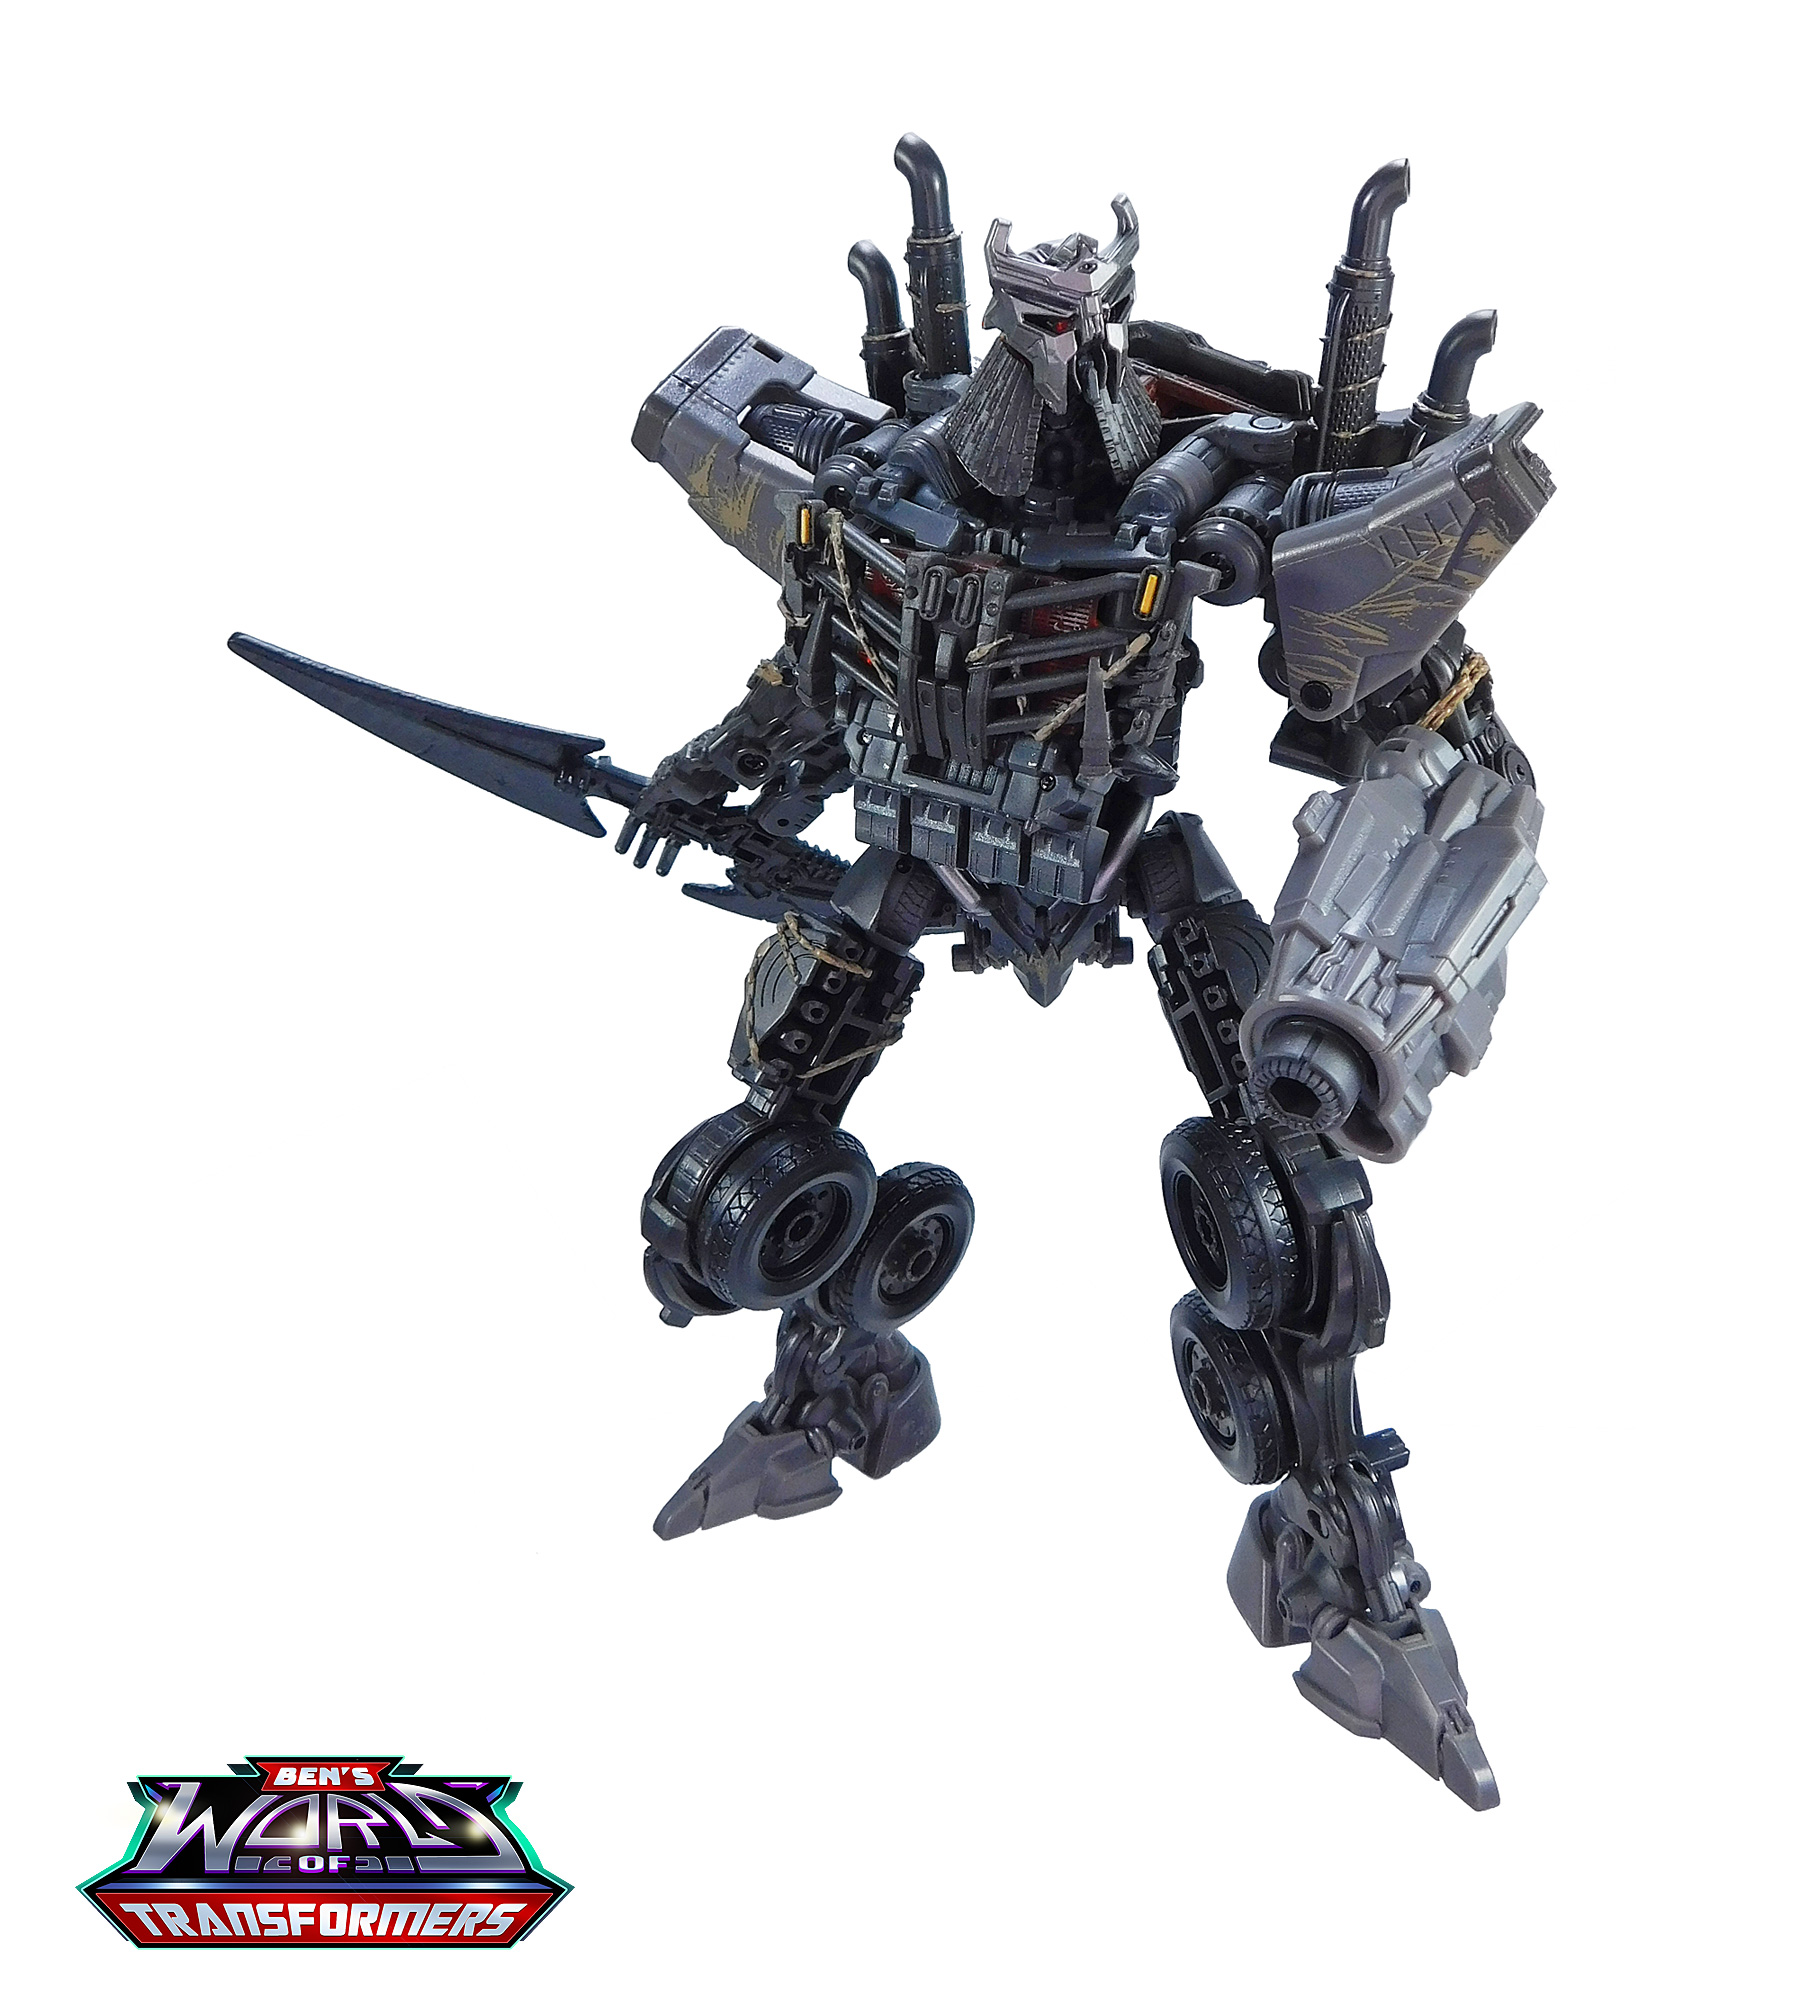
That said, having seen Rise of the Beasts three times now, I can say that for the most part, Scourge looks good! The figure has many of the key features of the CG model in the film including:
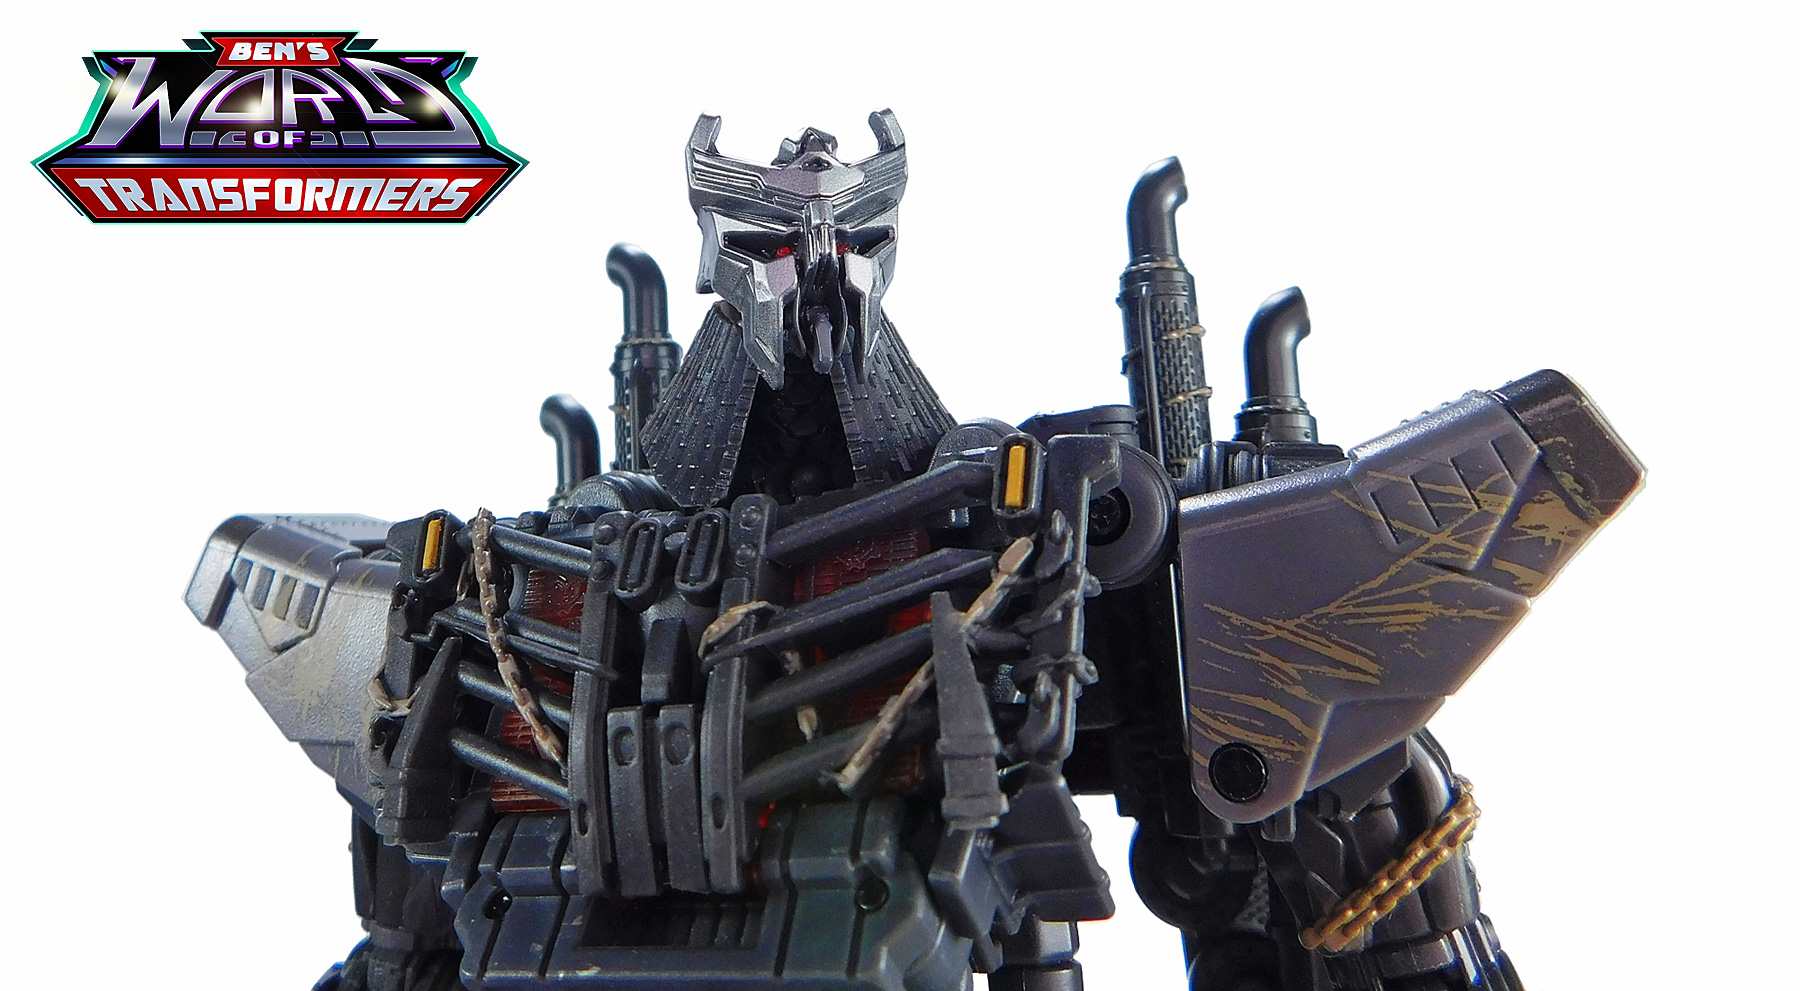
- The head design features a mask based on the Terrorcon symbol which itself is based on Unicron's head design complete with two "horns" coming up the sides on top and sharp points at the bottom.
- Scourge's body has chains wrapped around several parts including the chest, arms and right leg.
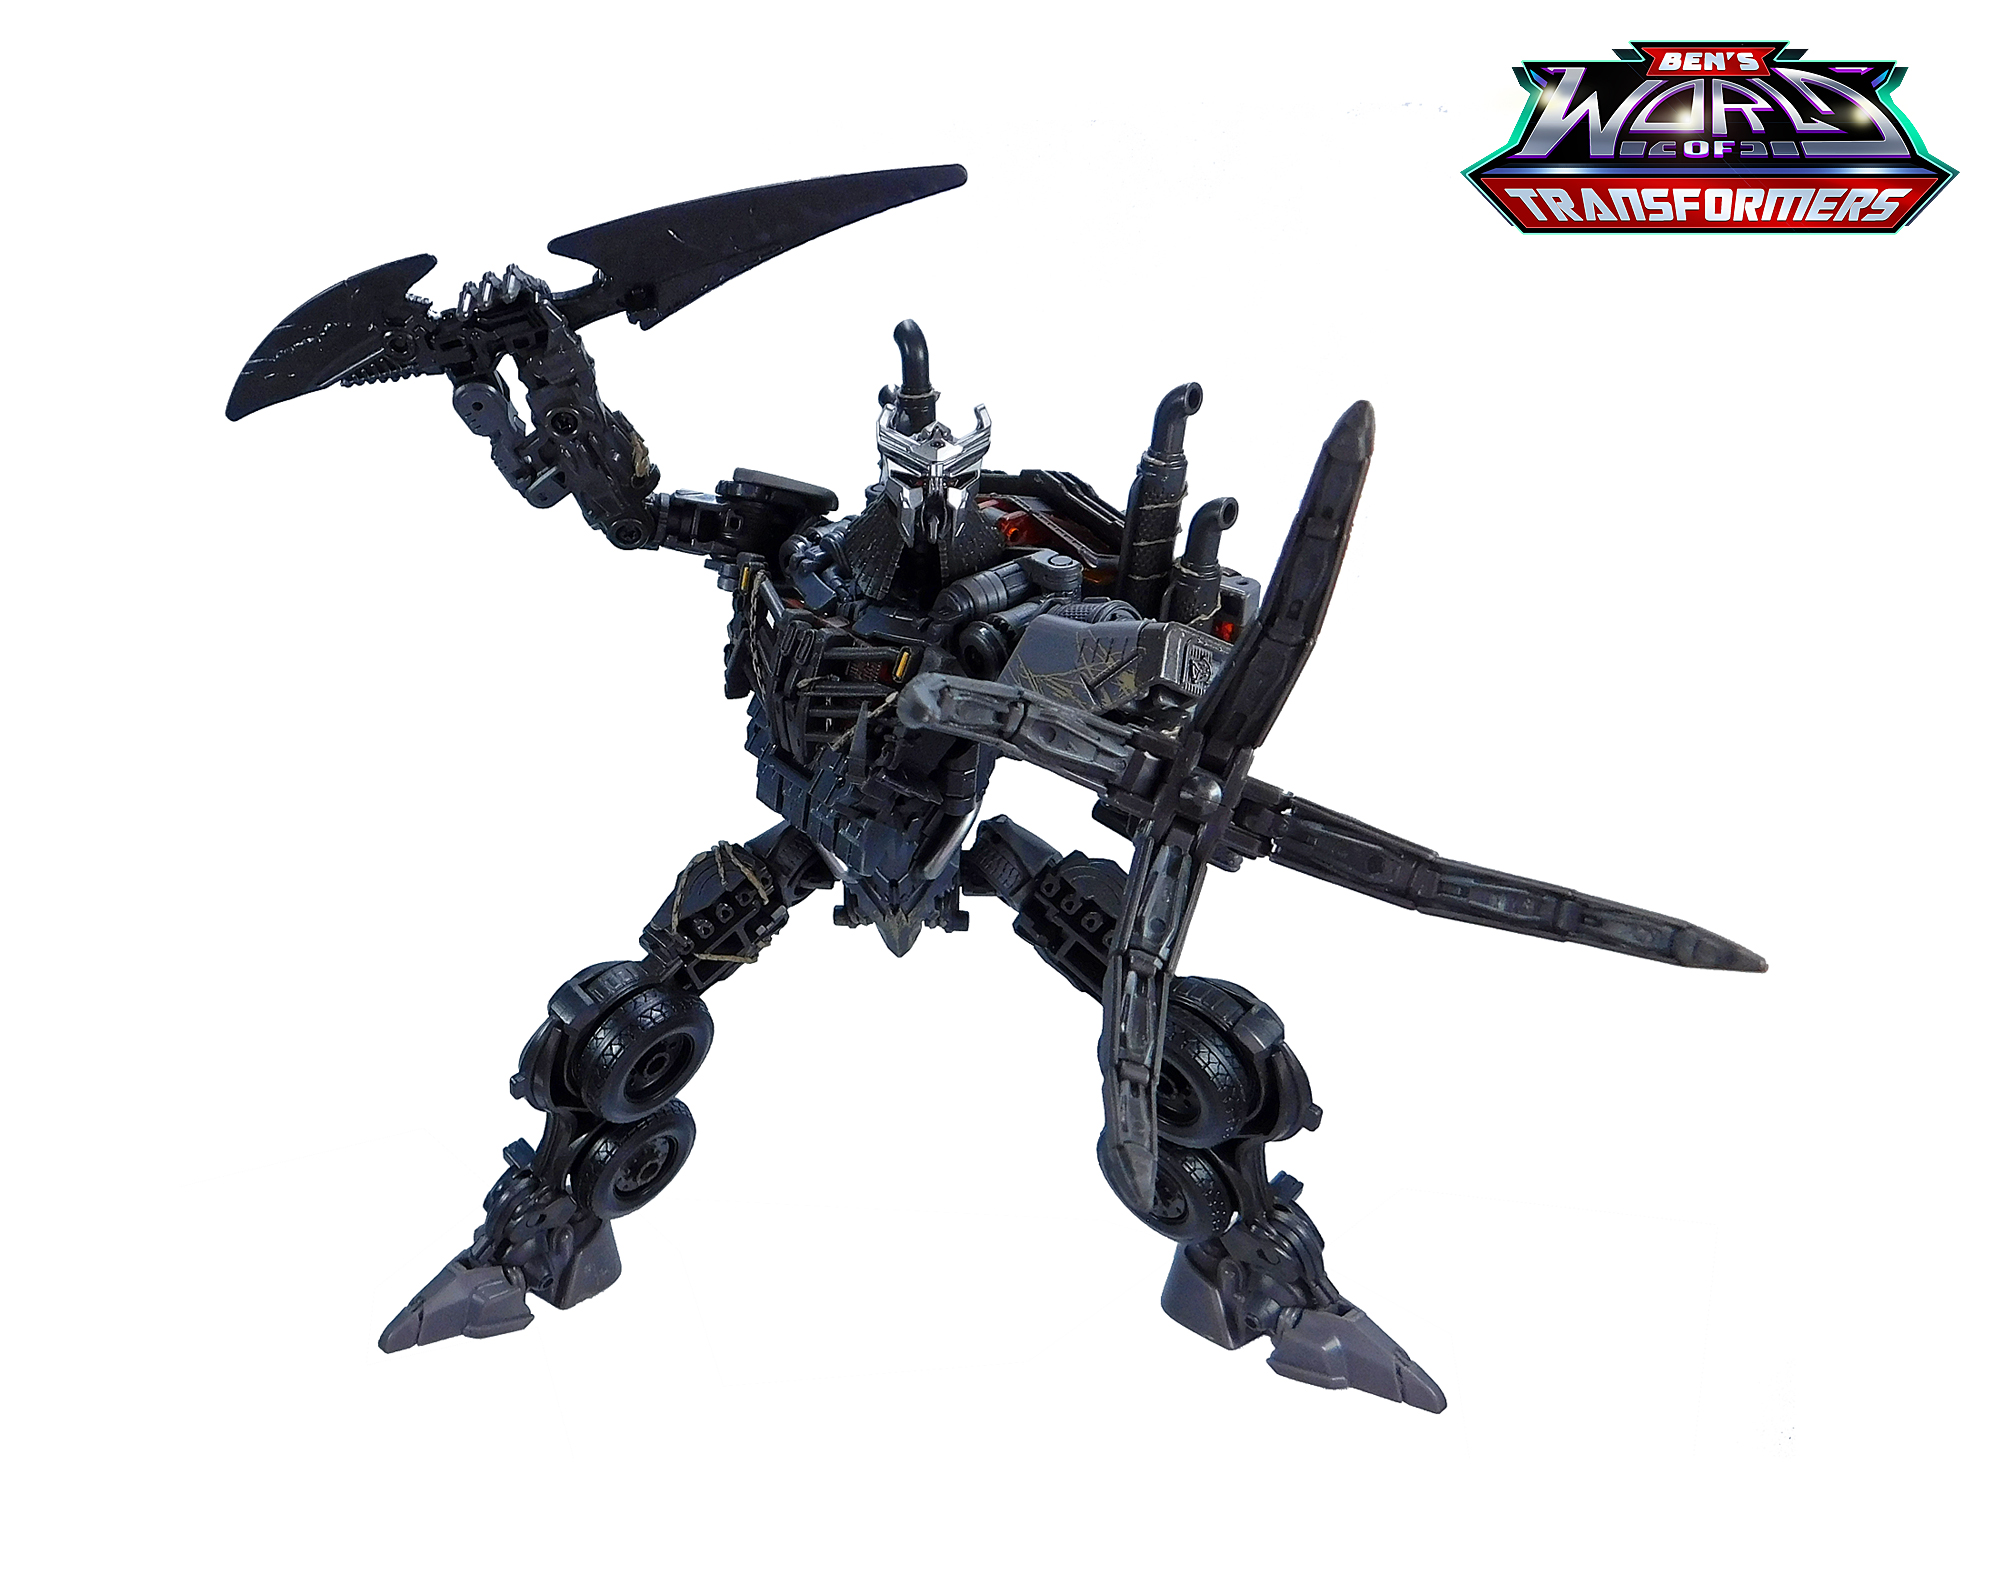
- The left hand is made up of four giant claw/fingers.
- The right arm has a large blade weapon attached to it (though in the film it could disappear completely).
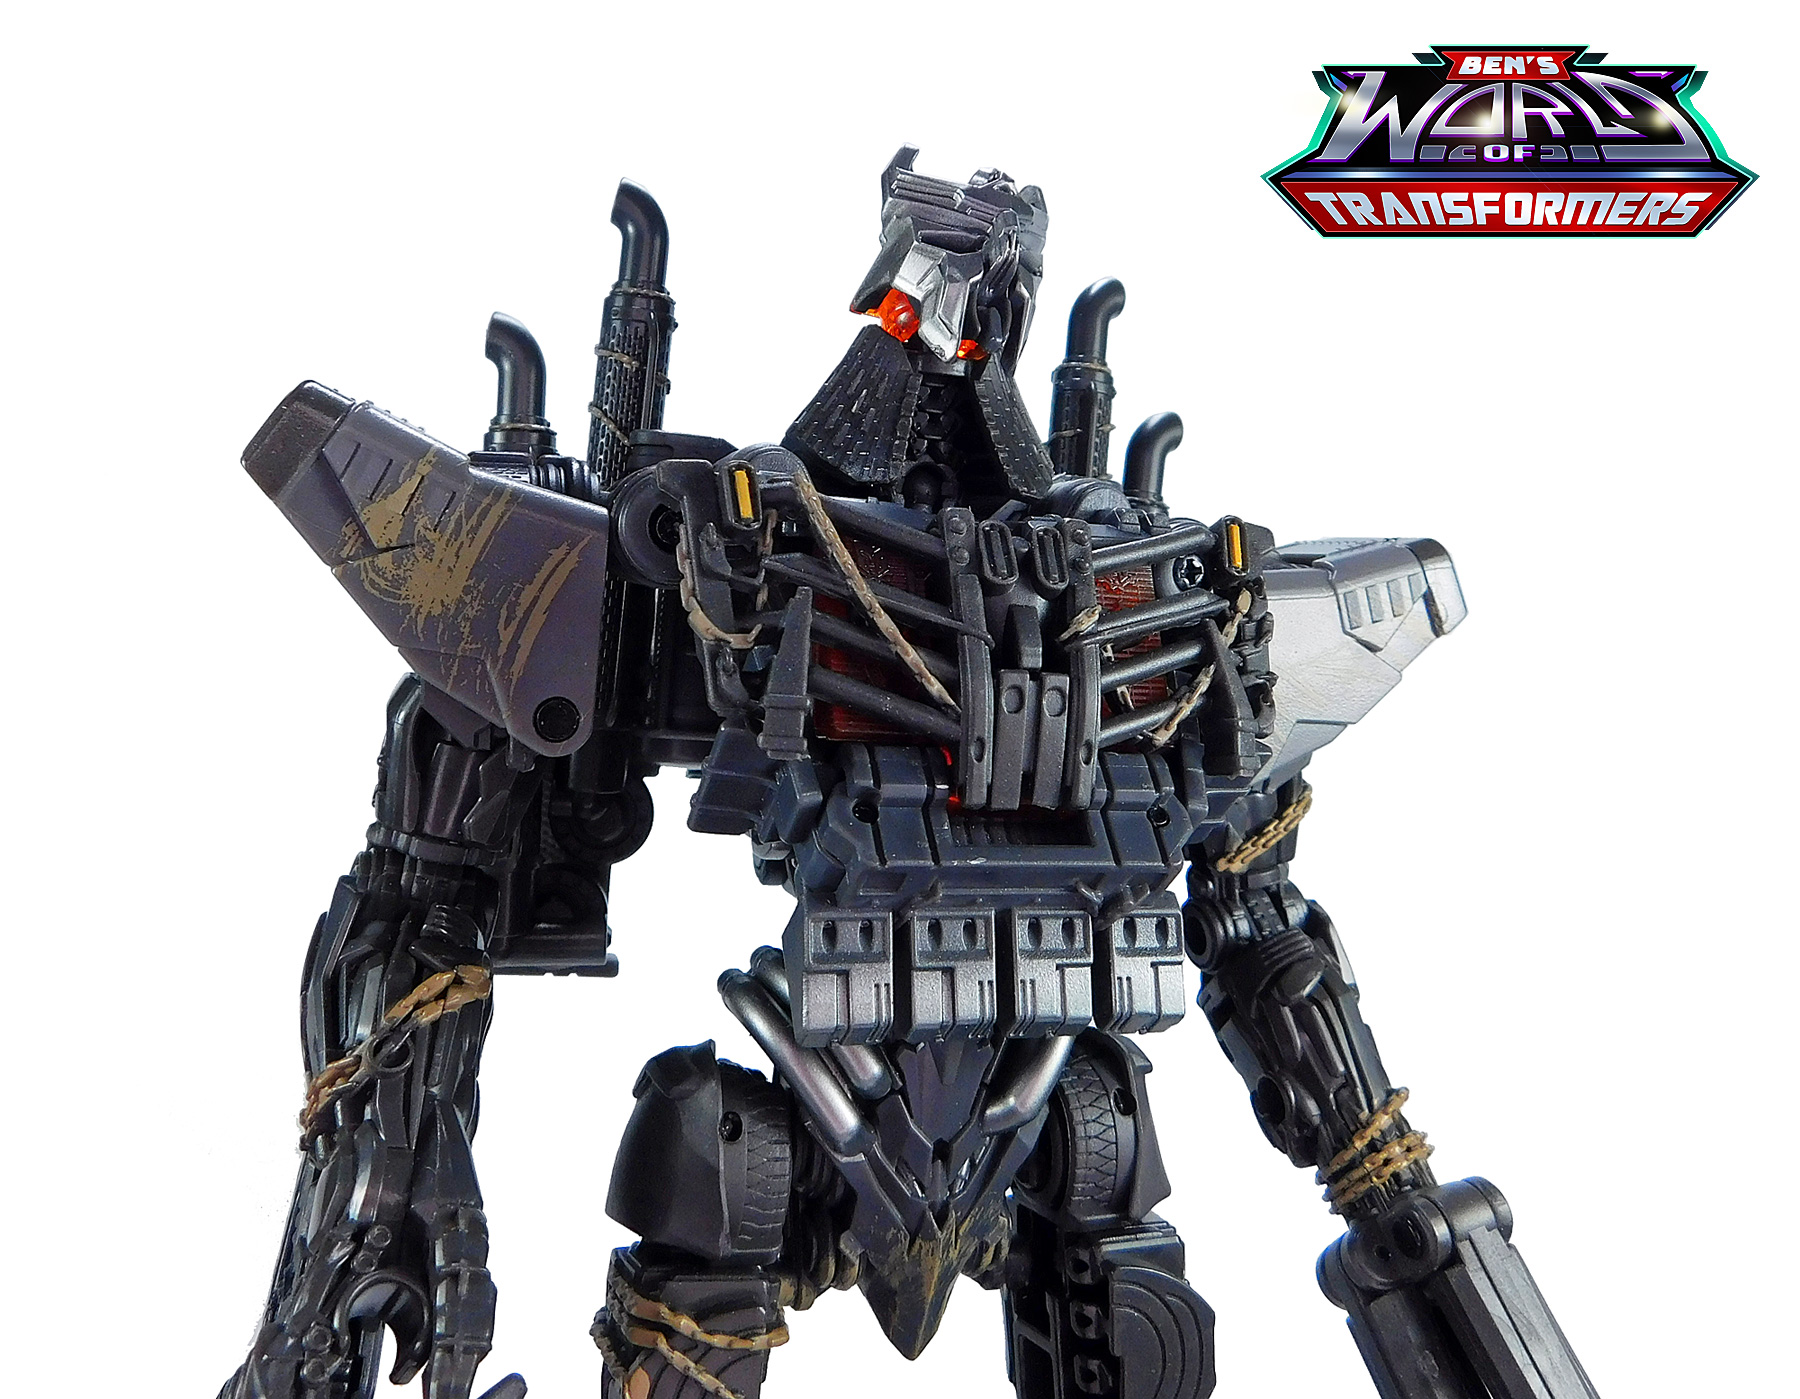
- The chest looks like it is made up of a vehicle grille, however it is angled so it winds up looking like the bones of a rib cage, giving Scourge an extra creepy appearance.
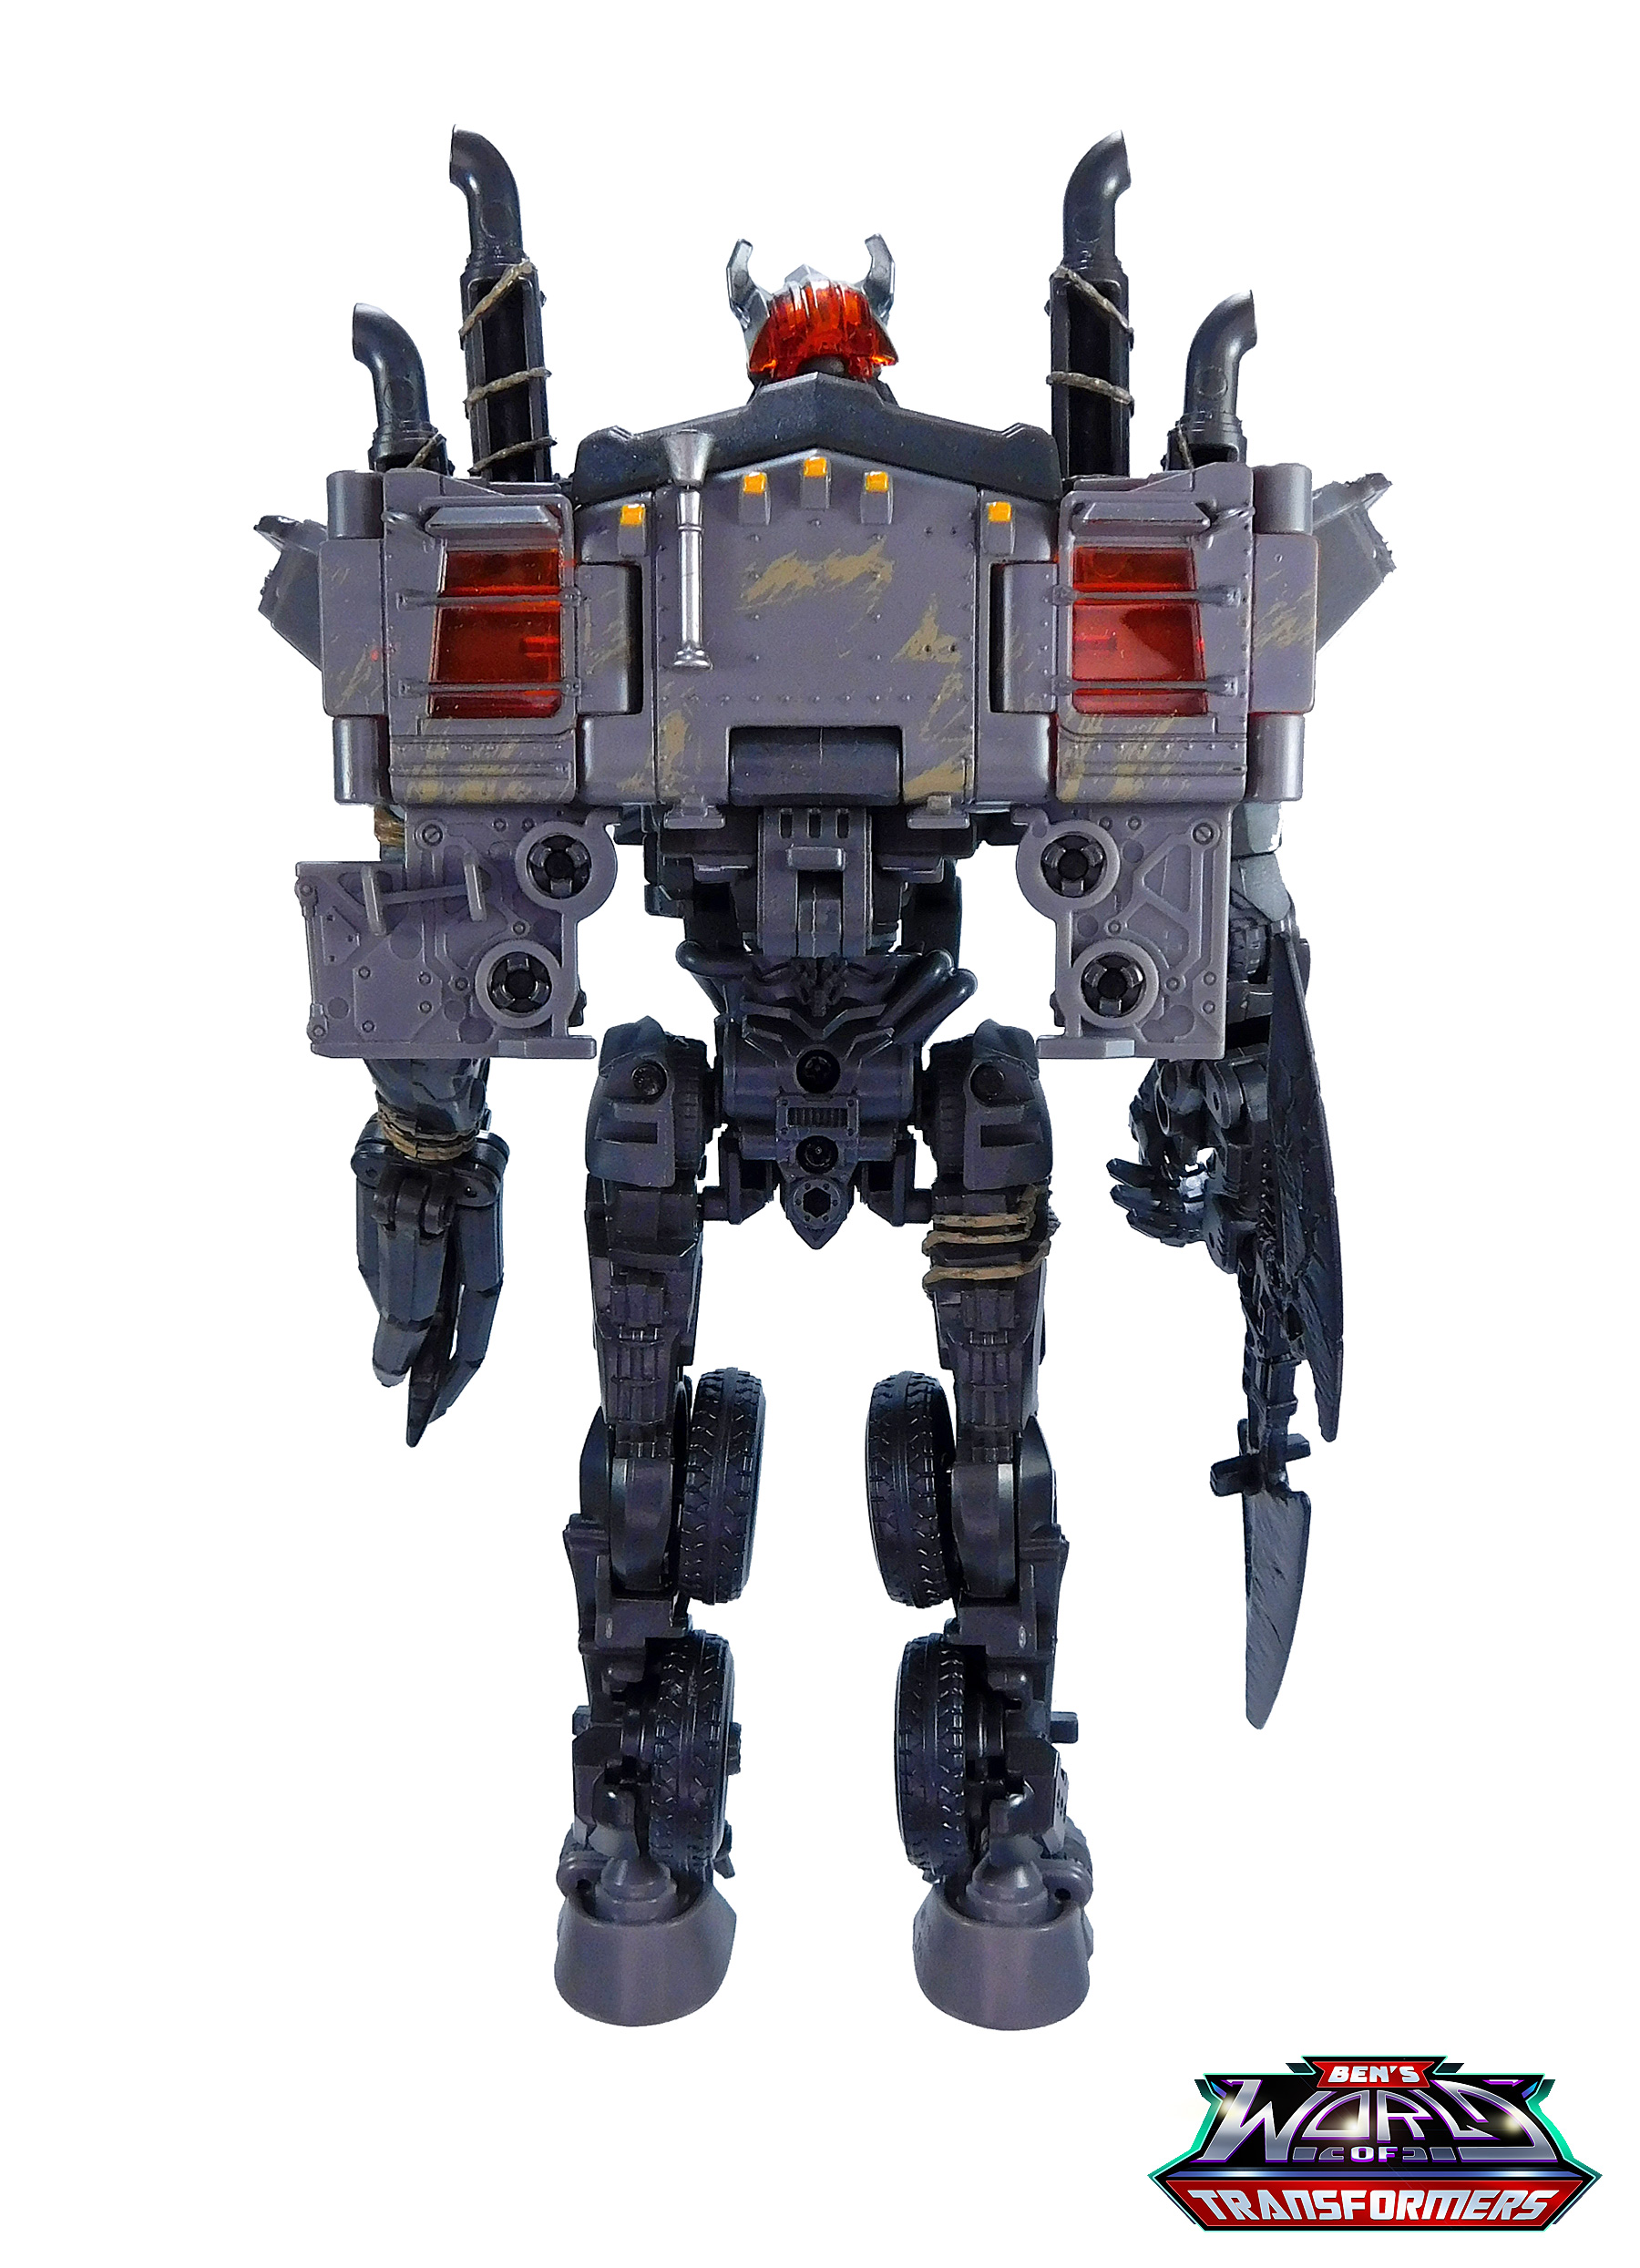
Of course, there are some significant differences from the film's CG model. One of the most significant is the back. On this figure some of the truck mode winds up flattening against the back including his smokestacks. In the film the back does not have truck doors on it but instead has a detail that looks like a spinal column and metal plates. Another difference is how the shoulder armor is positioned. In the film the armor seemingly wraps around the shoulders. Here it sticks out to the sides and angles upward. Another big difference is the neck area. On this figure there is a large, cone shaped collar piece but it is nowhere near as large in the CG model.
All that said, I do believe this figure is a good representation of the on-screen character, especially given that this relatively humanoid shape has to somehow transform into a blocky looking truck.
Scourge is made up of a couple different shades of grey plastic, black plastic and translucent orange plastic. Paint colors include beige, gunmetal grey and silver. The beige is used for some scratches and wear detail o the shoulders as well as the chains. I would say what this figure needs most would have been a better deco. Scourge looked very scratched up and grungy on screen. This figure looks a bit too "clean" in comparison. The sculpted details are rich, but there aren't enough paint applications to truly bring them out the way they deserve to be. That said, I will give kudos for ensuring translucent orange plastic winds up in the head and behind the chest plate as it calls back to the eerie glow in his chest and eyes in the film.
Scourge has a whopping thirty points of articulation in this mode. This includes his neck and head having separate joints, five in each leg, eight in the left arm and six in the right arm (counting the blade weapon). The right hand is open but the fingers can swing in to form a fist. The hand also has a 5mm port to hold weapons from other figures (or a Core Class Freezer in weapon mode!). The blade on his right arm folds as part of the figure's transformation but that also kind of calls back to the weapon unfolding on his arm in the film. The blade can also be swung up into the hand so it looks like he is holding a blade weapon. Throw in the weapon arm replacement feature and this figure has some fun play value!
If you want to store away Scourge's forearm, there is a tab on the back of the figure that you can use to store the claw arm or the blaster arm. The claw arm attaches vertically while the blaster arm attaches horizontally. The blaster arm stows away more successfully than the claw arm in my opinion. The claw arm extends so far down it looks almost like a tail. Still, I'm glad the designers found a way to keep both arms attached to the figure at any given time.
Transformation to Vehicle Mode:
- If you have the blaster arm attached, detach it and set it aside for now. Attach the claw arm in its place.
- Fold the blade on the right arm.
- Straighten out the arms and legs.
- Swing the back panels out.
- Swing the middle section out.
- Swing the sections with the smokestacks out to the sides.
- Swing out the small peg on the bottom of the left foot.
- Rotate both legs so the wheels face outward.
- Pull the rear most wheels out (they don't slide out a lot, just a little bit).
- Swing the toe sections in, then press them up against the inside of the ankle sections.
- Swing the blade weapon down.
- Swing the right arm against the back of the figure. The blade weapon should wind up between the legs.
- Connect the blade weapon to the inside of the right arm.
- Connect the feet together in between the legs using the peg on one foot to connect to the other.
- Swing the left arm up, then in towards the center.
- Fold the back piece down, then swing it forward.
- Move the middle of the back section and tuck it in between the two shoulder armor pieces, then push them together.
- Swing the robot chest piece up and swing out the small panels on the sides.
- Swing the front bumper piece forward.
- The front wheels are tucked under the front of the vehicle. Swing them forward.
- Push the front of the vehicle in.
- Swing the sides of the vehicle down.
- Rotate the smokestacks.
- Open up the side panels of the blaster arm.
- Swing the panels so they point the same direction, then rotate them outward.
- Attach the weapon piece to the two tabs on the back of the truck.
Vehicle Mode:
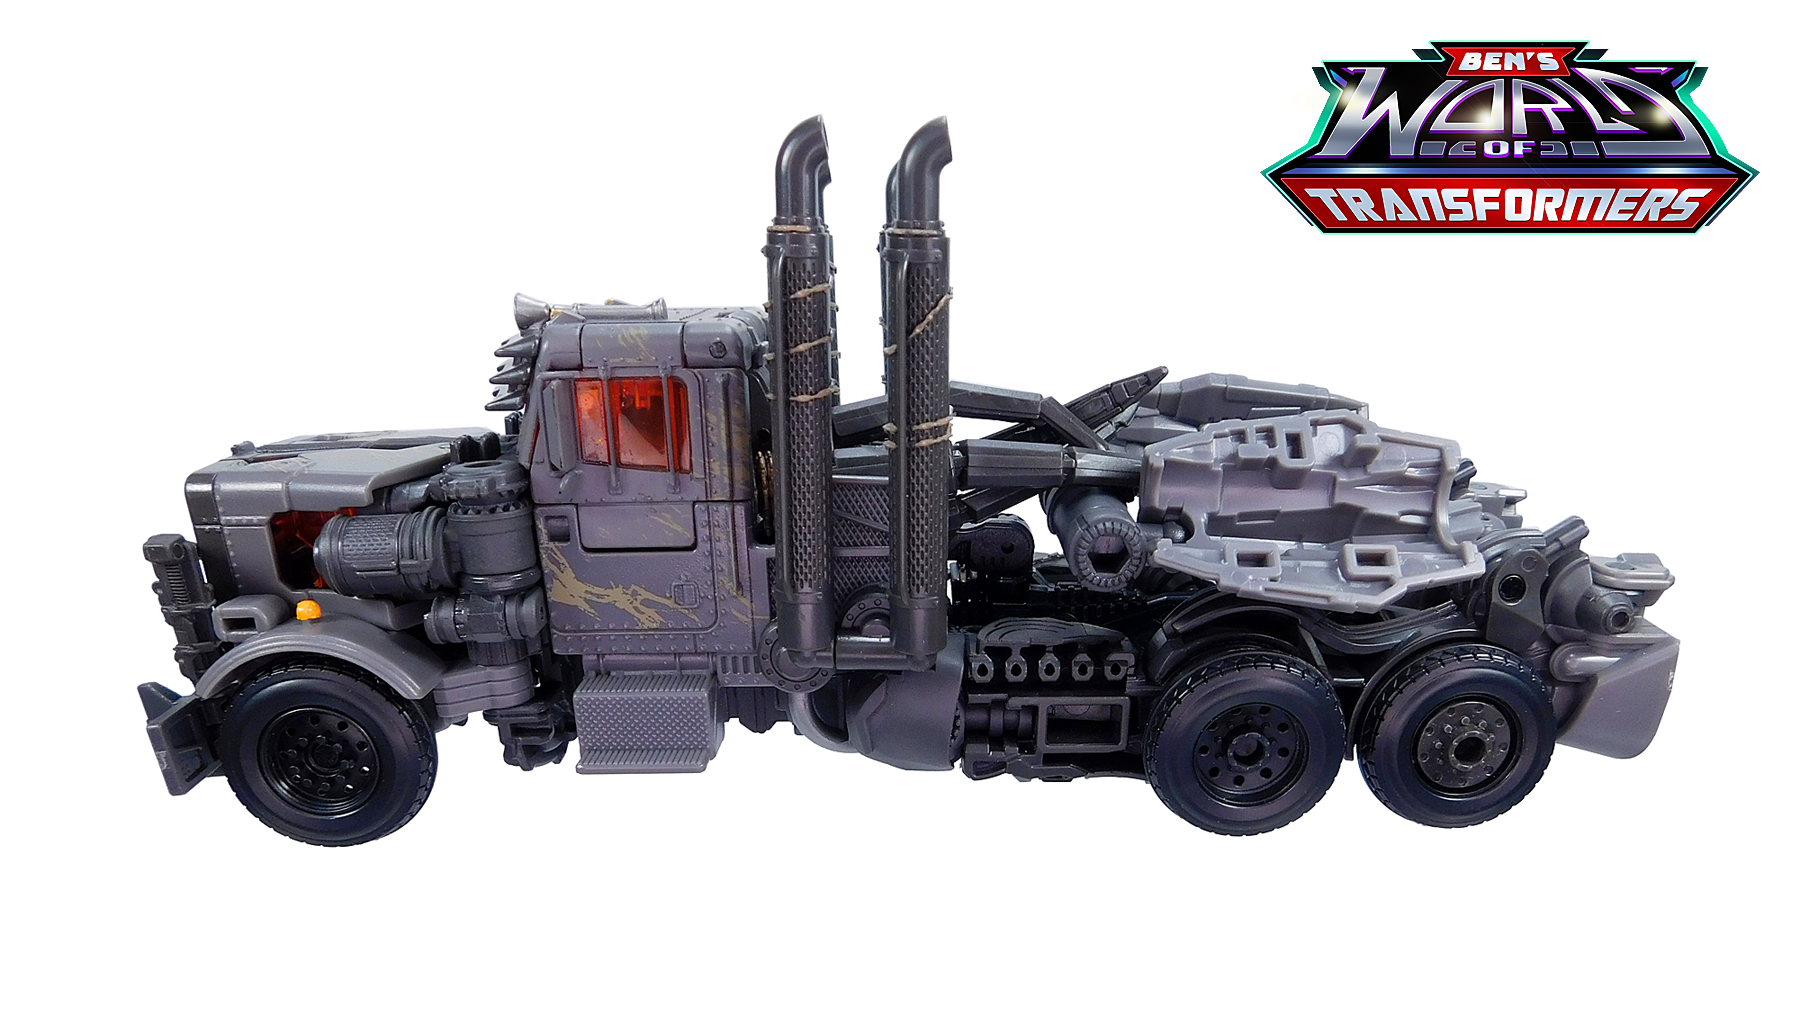
Scourge's vehicle mode is a Mad Max style longnose truck. This figure has many of the key features of the screen used truck including:
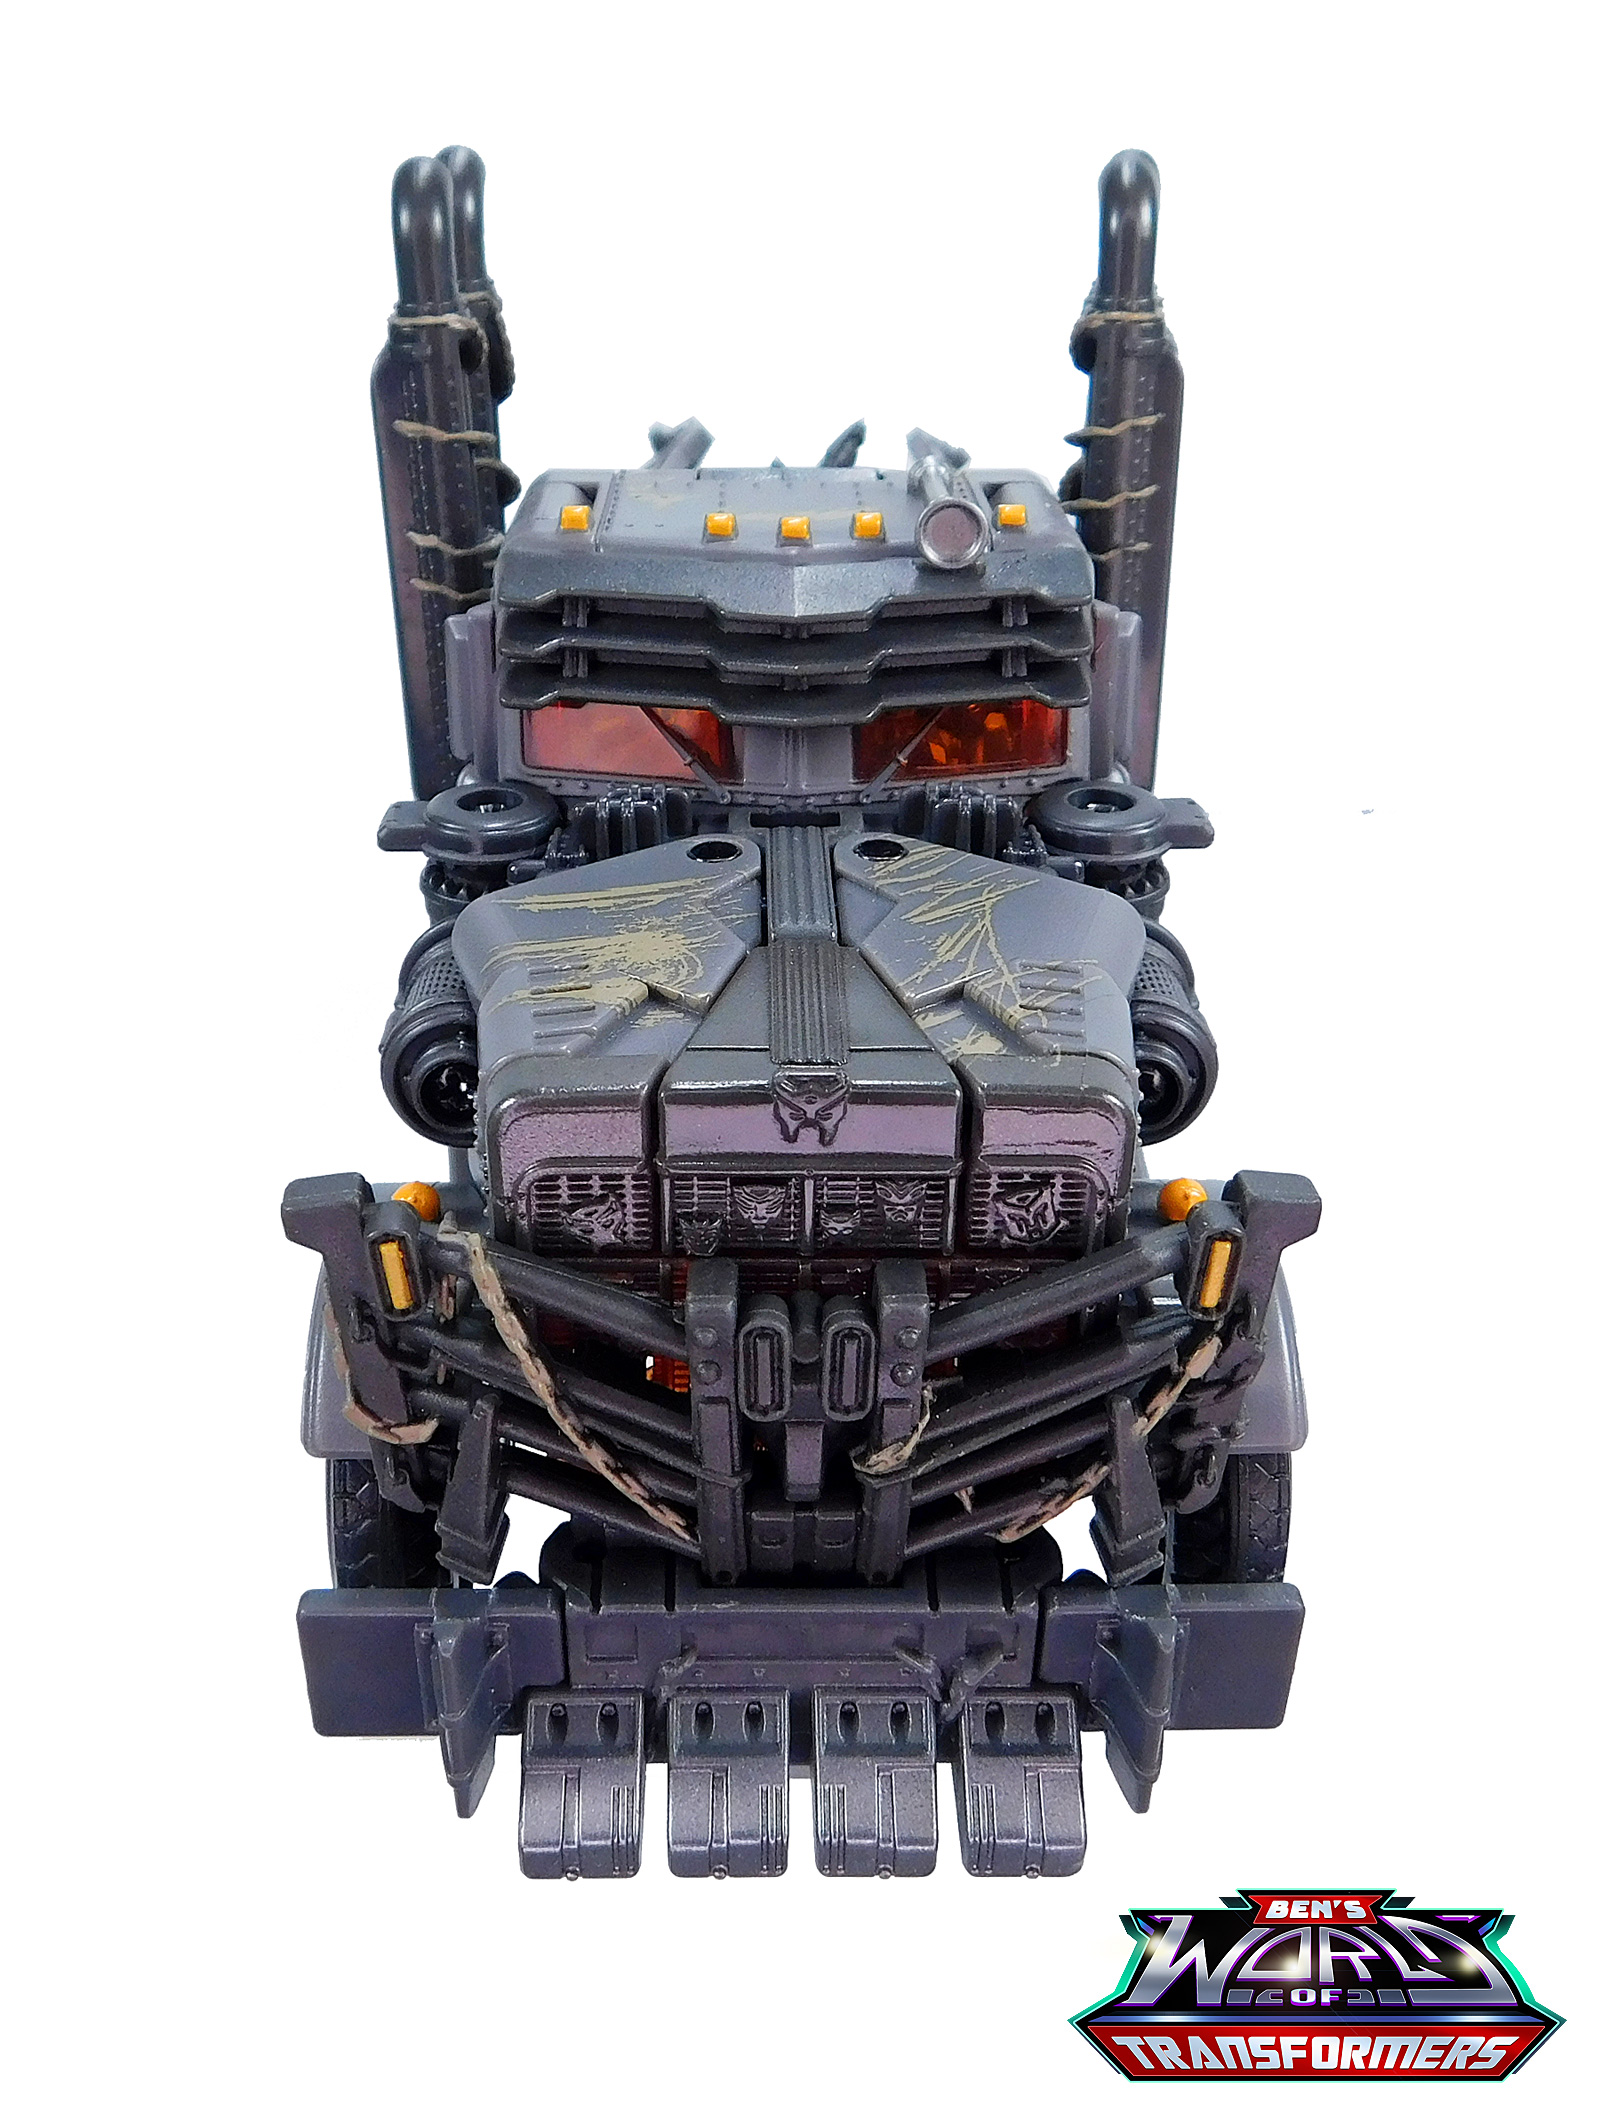
- The front of the truck has a series of bars and a "cow catcher" type section in front.
- The grille of the truck has several symbols sculpted into it representing Scourge's past kills including an Autobot, a Decepticon, a Maximal and even a Wrecker! Above all of them is the Terrorcon symbol.
- The sides of the truck have both vertical and horizontal cylinders on the sides.
- The windshield has three metal plates over them.
- There are small, horizontal tubes sticking out of the area near the windshield.
- The top of the cab section has five lights and one horn piece on the left side.
- Each side of the truck has two smokestacks that curve back towards the top.
- The back of the truck has a cylinder running across with two curved panels behind it.
- There are chains wrapped around parts of the grille and on the smokestacks.
- Each side window has two bars over it.
- Each side of the vehicle has a large step to get into the vehicle.
As you can tell from the list above this vehicle mode has a ton of details carried over from the on-screen vehicle and I love that. This represents a heavily customized vehicle so it is not licensed, yet it looks fairly screen accurate and I love that.
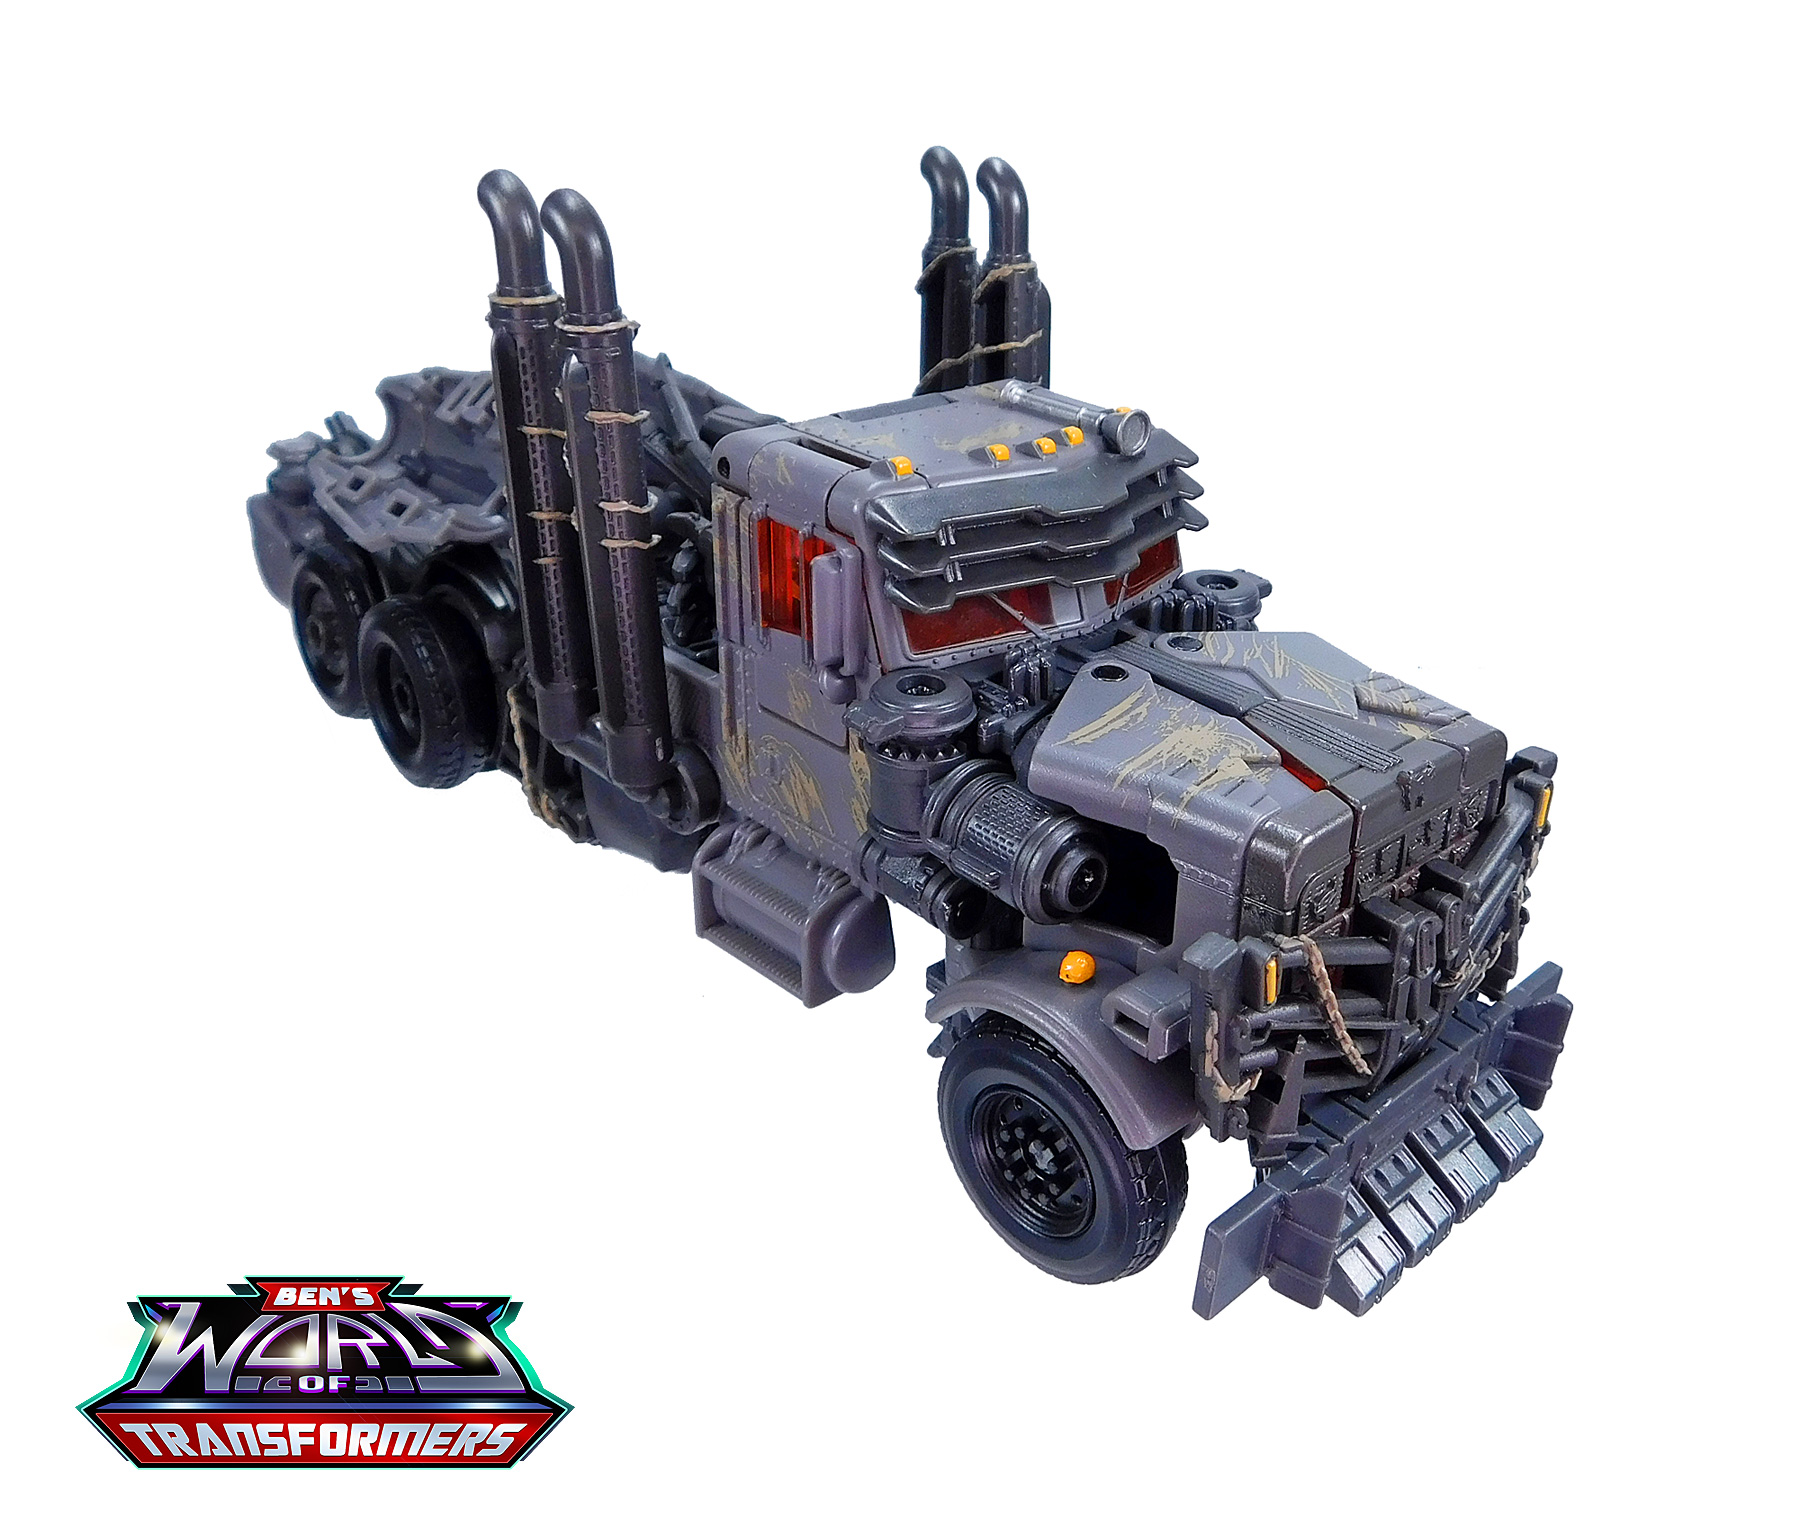
All the colors from the robot mode carry over here, but now you see more of a lighter grey color forming most of the cab section's front end. Paint details are once again "distressed" designs like scratches in beige. Orange paint is used for the lights on the cab section. There is also grey paint on the translucent orange windows. A bit of silver is used for the horn. While I do still wish there was more paint detail on this figure, this mode does look good.
All six wheels roll in this mode. There is also a feature not documented in the instructions: If you have the Core Class Freezer figure, you can convert it into weapon mode then connect the robot arms to the blaster panels in the back (see photo in the gallery below). This helps "fill out" the back of the truck and gives it some additional play value!
Final Thoughts:
Scourge may not be the perfect representation of the character from the film, but it does manage to capture the spirit of the character well and it is a fun figure to boot! My biggest wish is that the figure had more paint to resemble the damaged, dirty look of the character on screen. Recommended!
Pros:
- Nice sculpt in both modes with a menacing appearance and small details.
- Excellent articulation.
- Fun play value in both modes.
Cons:
- There are some differences between the on-screen model and this figure.
- The figure could have used more "distressed" deco.